
Sorry I've been away for so long. I started a new job at Santa Fe Opera in the Costume department, and it's taken up all my time.
Anyway, I took some time off this week to take a doll class with Ankie Daanen (www.ankie-doll-art.com), a Dutch artist who now lives in Spain. She comes to America every other year or so, and teaches doll classes. So, getting a chance to take her class was a real treat for me. It was an exhausting 4 day-class, making her doll, "Black Beauty". It's a doll entirely sculpted out of paper clay.
Ankie's "Black Beauty", the class sample:

Ankie's style is very unique. Her dolls are part girl, part whimsy. (Ankie is rather tall and slender, and so are her dolls!)
Here's a photo of the work I completed the first day:

Sculpting with paper clay is a slow process. You have to build it up in layers, letting each layer dry before adding more clay. We had ovens going to help dry out the clay as we worked.
Here's what I accomplished the second day:

The third day:

Okay, now it's starting to look like a doll! Ankie gave us costume kits she had made for us. Here, I've gathered, stitched (and glued) all the pieces to the body & arms. Plus, we painted the shoes. Lace was glued to the legs, and several layers of skirts were stitched on. We had some stretch velvet tubes for the top and sleeves.


Before the wigs could be glued on, Ankie painted a layer of matte lacquer over the faces to save the color. (She was nice enough to do that for us, while we were furiously stitching the costumes pieces together!)
Here's Ankie glazing our heads:


Notice how my head (back row) has more color and make-up than the others??? I couldn't help it. Once I started adding color, I couldn't stop until she was a full blown Glamour-Diva!
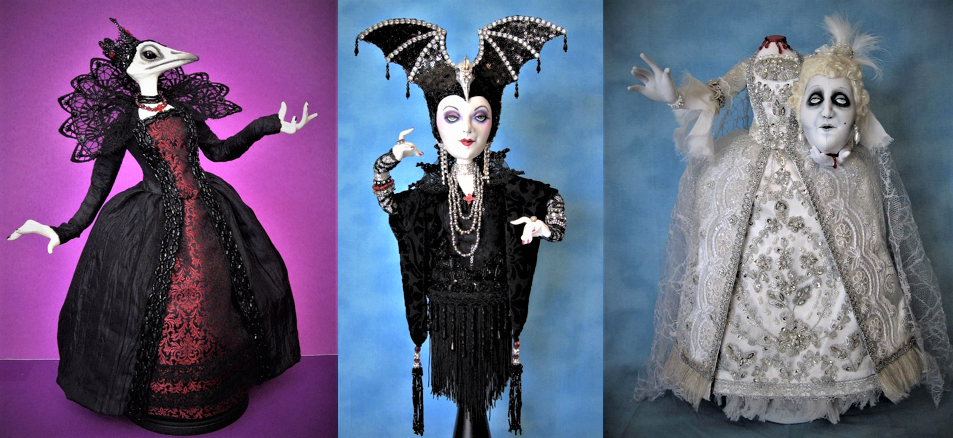
Here are some of the finished dolls in the class:

My doll sort of looks like a Victorian hooker, next to all the sweet, cute dolls in the class.
But, as I told Ankie -- I don't do "cute"!
Have fun!